-
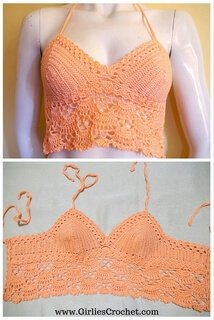
Celeria Summer Top
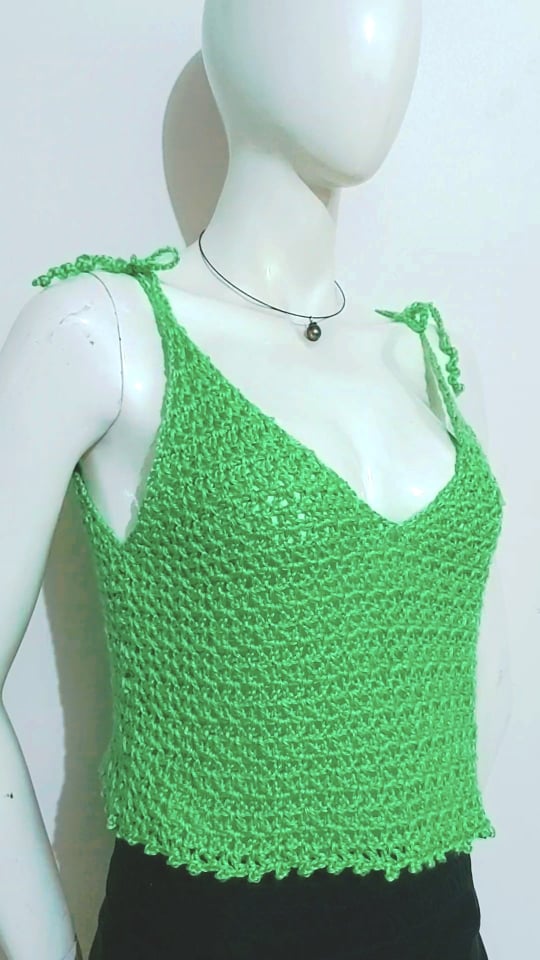
This is a free crochet pattern for Celeria Summer Top, a pattern best suited for beginners with easy customization instructions.
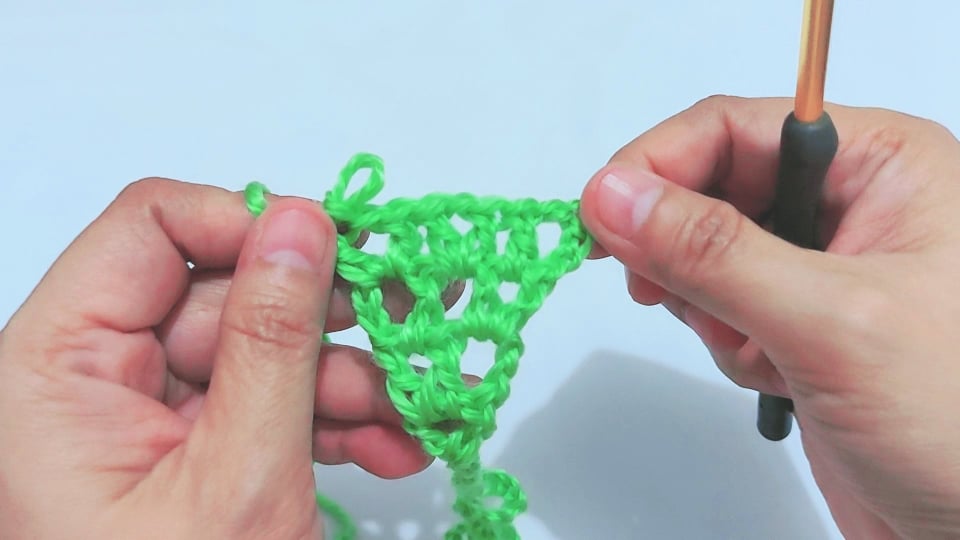
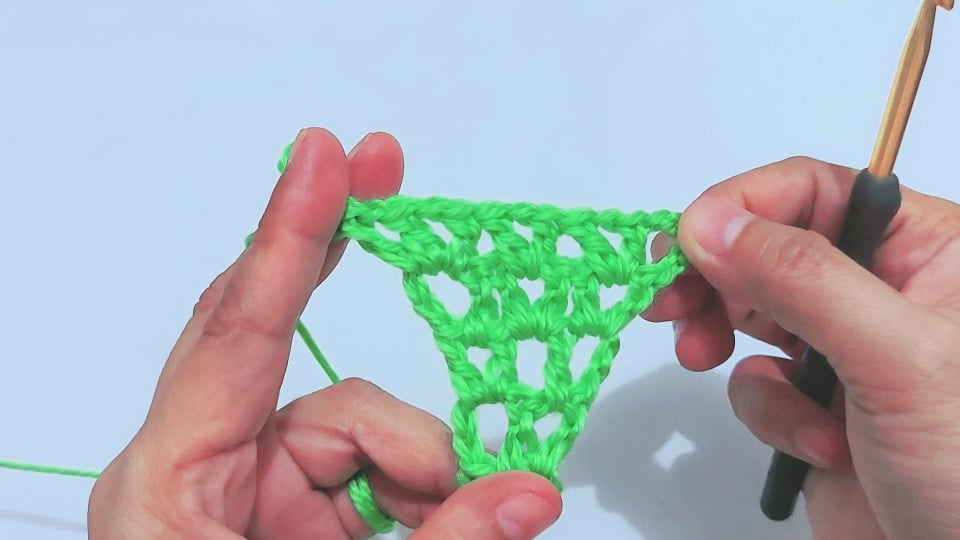
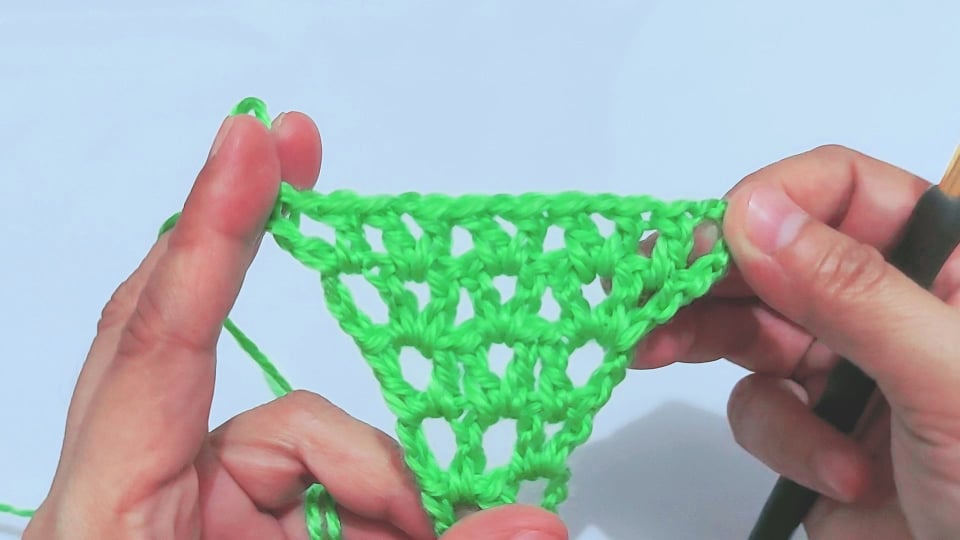
This pattern starts out with the strap working towards the first cup (triangle), after completing the first cup (triangle) you have to crochet 3 more of this. Continuation for the body by joining all four cups (triangle) continuing on to the edging.

This will make a perfect gift for teens or as a cover up for adults. You can make this as a dress or cover up by continuing on until reaching your desired length.
This pattern is for Medium size. You may adjust the size by following the instructions.
Skills:
Beginners
Materials Needed:
Yarn: Soft & Shiny Solid Yarn by Loops & Threads, Celery
Hook: 5.00MM
Terms Used:
All terms are in USA terminology
Ch: Chain, Sc: Single Crochet, Dc: Double Crochet, Sl st: Slip Stitch, Sp: Space, Sk: Skip
**: Repeat what is between * to *
[ ]: The number of times you have to repeat what is between ( )
( ): Group of sts to crochet in specified st / Number of stitches at the end of row.
Stitch Guide:
V-st: dc, ch 1, dc in next ch sp
V-st Inc: dc, ch 1, dc, ch 1, dc in next ch sp
Picot: Ch 3, sl st in top of specified dc
Celeria Summer Top Instructions
Row 1: Make a slip knot, ch 64 (this chain will be your shoulder strap, you may crochet any strap you want), dc in 4th ch from hook (consider ch 3 as dc, ch 1 as sp).
Row 2: Ch 4, turn, dc in ch 1 sp, ch 1, dc in last dc.
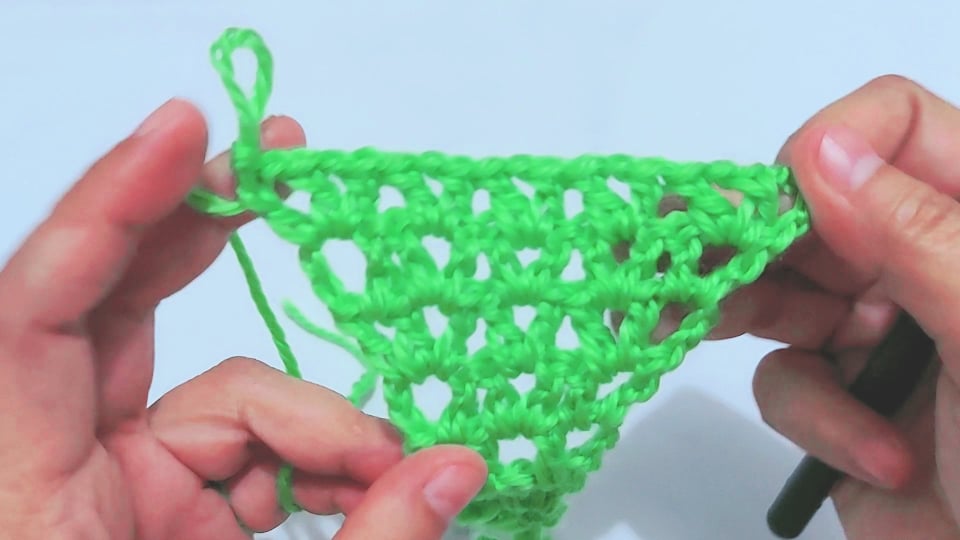
Row 3: Ch 4, turn, dc in ch 1 sp, ch 1, v-st in next ch sp. (2 v-st)
Row 4: Ch 4, turn, dc in the same ch sp, [v-st in next ch sp] twice. ( 3 v-st)
Row 5: Ch 4, turn, v-st in the same ch sp, v-st in next v-st, (dc, ch 1, v-st) in last v-st (consider as v-st inc).
Row 6: Ch 4, turn, dc in the same ch sp, [v-st in next v-st] across. (5 v-st)
Row 7: Ch 4, turn, v-st in the same ch sp, [v-st in next v-st] across, v-st inc in las v-st. (3 v-st and 2 v-st inc)
Row 8: Repeat row 6 (7 v-st)
Row 9: Repeat row 7 (5 v-st and 2 v-st inc)

Row 10: Repeat row 6 (9 v-st)
Row 11: Repeat row 7 (7 v-st and 2 v-st inc)
Row 12: Repeat row 6 (11 v-st)
Row 13: Repeat row 7 (9 v-st and 2 v-st inc)
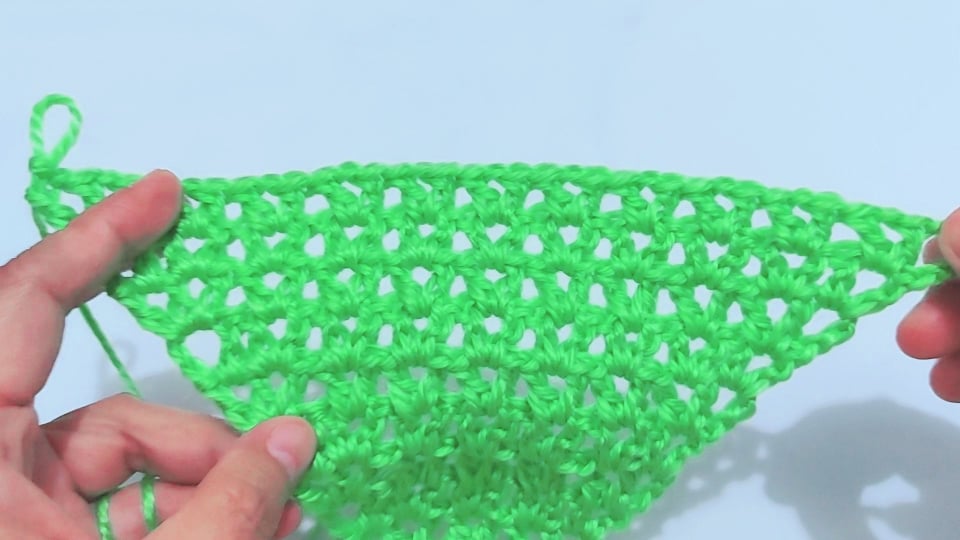
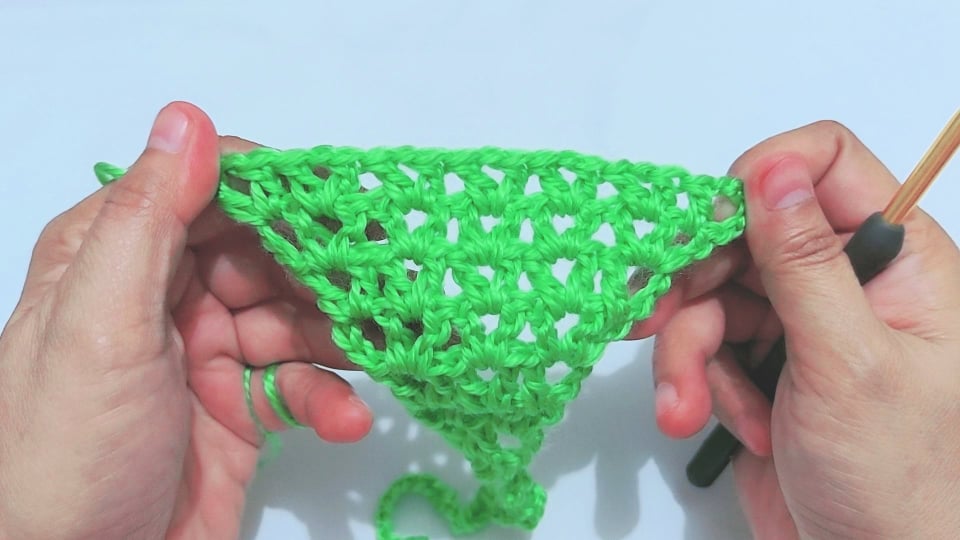
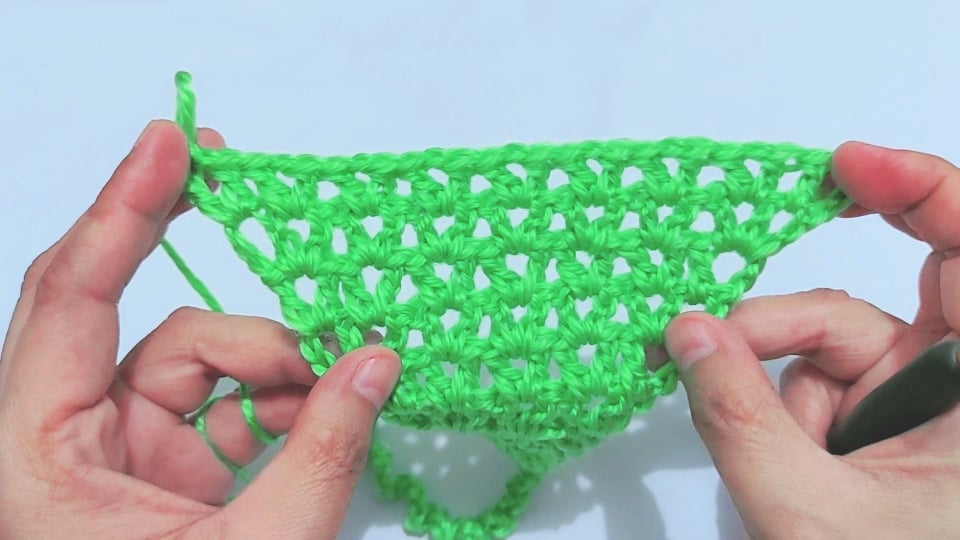
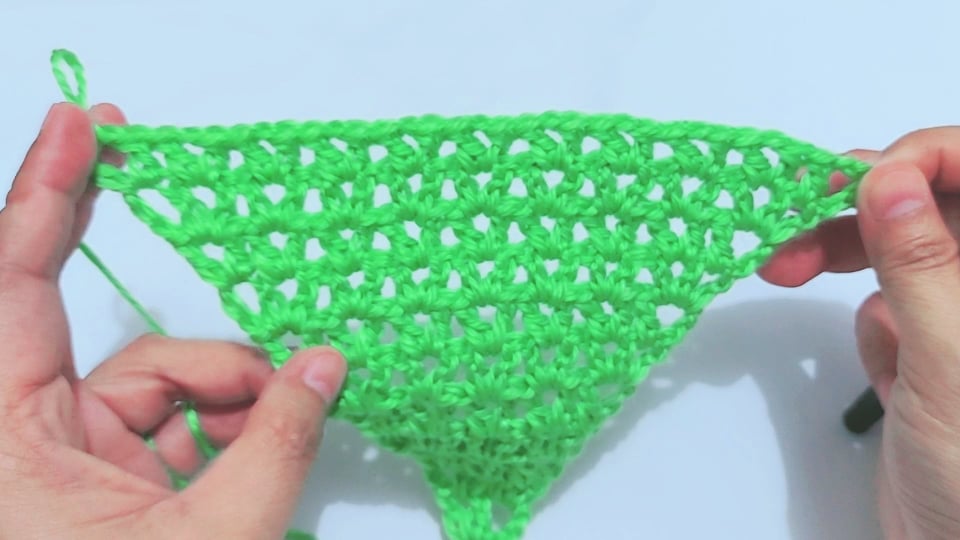
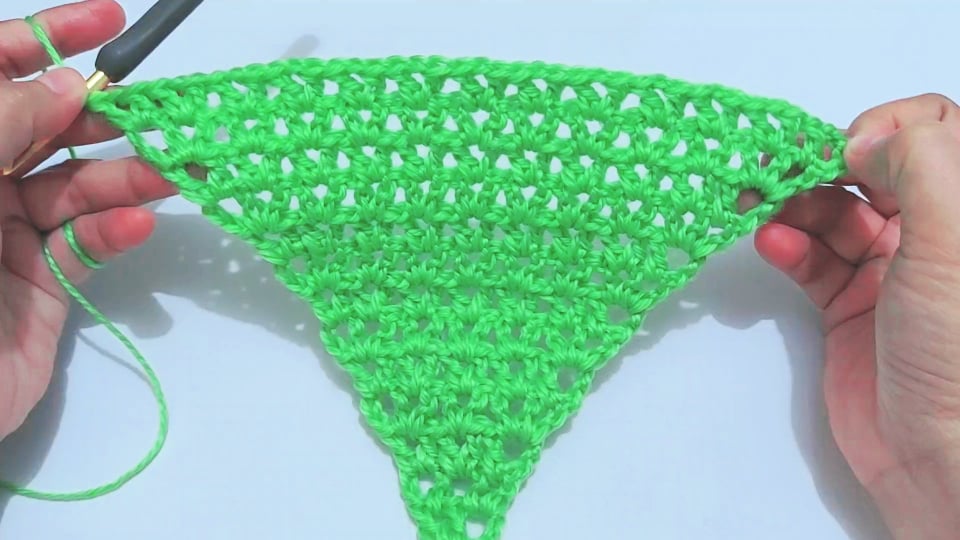
These instructions is for your cup (triangle, upper side), to adjust this side to your cup size, repeat row 6 and 7 once more or according to your desired size. I used a bigger size for loose fit.
Make 4 pieces.
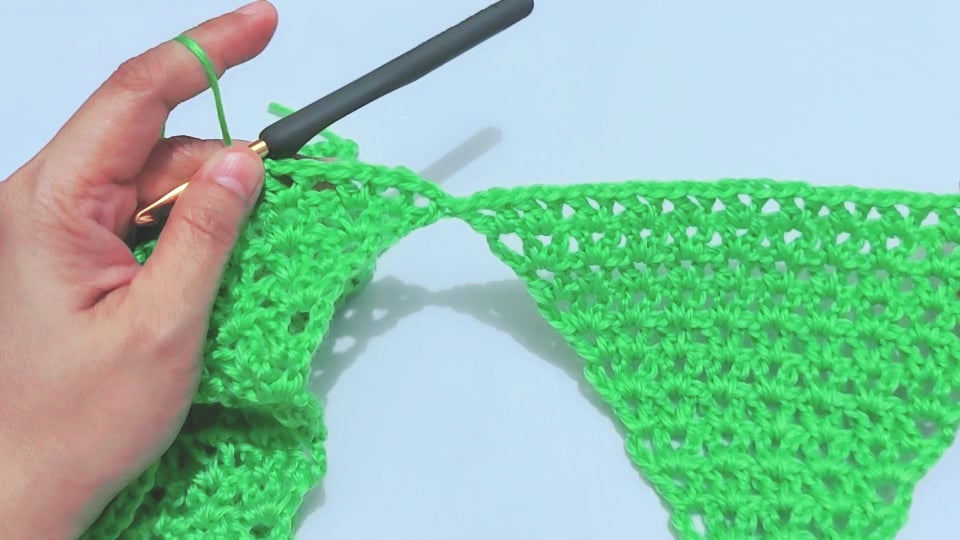
Try to pile up the 3 on their same sides, turn the 3 together on wrong side. Count your v-st in each cup, it should all be equal. Go to the last cup (triangle) completed and continue.
Row 14 (Consider as Round 1, joining all 4 together): Repeat row 6, then continue to other 3 cups (triangle) by joining them,
hide the tails along the way, repeat row 6 by joining all 4 cups together, sl st in 1st dc to join. (Time stamp in the video 9:00).
Now, we will work in rounds, don’t forget to turn at the beginning of each round.
Round 2: Sl st in next ch sp ch 4 (consider ch 3 as 1st dc), turn, dc in the same sp, [v-st in next v-st] around, sl st in 1st dc.
Round 3: Sl st in next ch sp, ch 4, turn, dc in the same sp, [v-st in next v-st] around, sl st in 1st dc.
Round 4 and onwards: Repeat round 2 until you reach your desired length of the top.
Last round / Edging: Sl st in ch sp, ch 6, sl st in 3rd ch from hook, ch 1, turn, dc in the same ch sp, (dc, ch 3, sl st in top of dc, ch 1, dc) in next v-st, “ v-st w/ picot has been made”, [v-st w/ picot in next v-st] around, sl st in 1st dc to join.
Fasten Off.
For Video Tutorial , please watch this....


-
-
Recent Articles
-
Beautiful and easy
Mar 16, 26 09:04 PM
 I was making an extra large, so I did 30 rows, and added 3 rows of half double crochet to the bottom. Rows went quickly, and it came out just beautifully.
If you like to support my work as a crochet designer, buy me a cup of coffee.
-
Everything You Need To Build An Online Business - Solo Built It!


Popular Free Crochet Pattern


Like us on Facebook
If you like to support my work as a crochet designer, buy me a cup of coffee.
-
Girlie's Crochet and GirliesCrochet.com are © and TM 2013-2026 of Girlie D. de los Reyes .
All rights reserved.
Disclaimer l Privacy Policy l About Me l Home
"BE BLESSED AND BE A BLESSING IN 2026"

